

How do you know your marketing campaigns are working? If you don’t split test, you’re missing out on leads and sales without even knowing it.
Split testing shows you if your marketing is working, and where you can make changes to improve its effectiveness.
In this guide, we’ll show you exactly why split testing is important, and how to create a split test to improve your lead generation and get better returns on your marketing.
What Is a Split Test?
A split test is a method of testing multiple versions of a web site (or individual elements of a website) against each other to see which works best.
New to split testing? Let’s start with a few split testing definitions.
Just like in a science experiment, a split test starts with a control: the original version of whatever you’re testing.
To start the split test, you’ll need a variant to test against your control. The variant is a changed version of your control, and you’re testing them against each other to see which performs better.
What do we mean by performing better? In a split test, the purpose of the test is to boost your conversions. A conversion is any action you want someone to complete, like signing up for your email newsletter or buying your product.
Split testing is an essential part of conversion optimization, which is improving your web pages and marketing to increase the rate at which people complete the desired action, and convert.
Another common name for a split test is an A/B test. With an A/B test, you divide your web traffic in two, with 50% of your traffic seeing the control and 50% seeing the variant.
If you want to test more variants of a single element (for example, three different button colors), you can run an A/B/n test, dividing your traffic into multiple equal segments, and showing one variant to each segment. Most professional conversion optimizers recommend you test no more than four variants at once. If you have a low-traffic site, though, it’s better to keep it simple, or it’ll take too long to get results.

What if you want to change multiple aspects of your web page or optin form? Then you’ll need to do multivariate testing, explained in detail in our split testing vs. multivariate testing guide.
Why Should You Run a Split Test?
Running a split test isn’t about making a change for the sake of change. Most marketers run split tests because they suspect an aspect of their marketing isn’t working well, or because they think they can get even better results, such as more leads or sales, from a web page.
Split testing actually has many potential benefits. These include:
- Getting rid of any uncertainty about marketing campaigns by eliminating guesswork.
- Learning how customers actually respond, rather than how they think they will respond, which can happen with survey data.
- Gaining unexpected insights that can drive improvements across the company.
- Creating better and more effective content.
- Maximizing web traffic and visitor engagement.
- Reducing risk by testing changes before making them permanent.
- Improving revenue. If you get more leads and sales by making small changes, then your business becomes more profitable.
Overall, split testing is a cost-effective and easy way to improve your website and marketing.
Preparing for Your First Split Test
Before you start your first split test, you’ll need to know what you can test. In general, this’ll include headlines, page copy, button text, colors, forms, images, social sharing buttons – basically anything that appears on a web page or landing page.
If you’re doing email marketing, you can also split test email subject lines, copy and images. And in both cases, you can test your call to action.
Recommended Resource: Want to improve your email open and click rates? See our ultimate guide on How to Split Test Email Campaigns the RIGHT Way.
To ensure that your split tests are effective, there’s a tried and true procedure you should follow. It goes like this:
Step 1: Observe and Collect Data
You’ll want to know what’s happening now on your site or with any element you want to test, like your optin campaigns. You’ll need that data in the next step, so this phase is very important.
A key place to collect data is your web analytics account, where you’ll pay attention to top landing pages, entrances and exits, bounces and, if you have set up goals, conversions.
If you’re using OptinMonster, and have linked it with Google Analytics, you’ll also be able to see conversion rates for your optin campaigns in your dashboard. As you’ll see later, you can also split test and optimize these campaigns.
Step 2: Form a Hypothesis
A hypothesis is an idea about why you are seeing the results you’re seeing and how you could improve them. A good conversion optimization hypothesis also states a specific goal, and how you will measure success.
Here’s an example of how you’d put that together:
- Issue: Not enough people are clicking the submit button on our email newsletter sign-up form. We think this is because the button does not stand out against the background design.
- Proposed solution: We believe that if we lighten the background so the button is more visible we will get an increase in sign-ups.
- Success metrics: We will know this works when we get a 5% increase in sign-ups in the next 14 days.
Step 3: Run Your Test and Collect Data
You’ll use the data you collected in the first step as a baseline for measuring your results, so you can tell whether the control or the variant is more effective.
You’ll use the data you collected in the first step as a baseline for measuring your results, so you can tell whether the control or the variant is more effective.
Now, let’s look at how you can run split tests in OptinMonster and Google Optimize.
How to Set Up a Split Test in OptinMonster
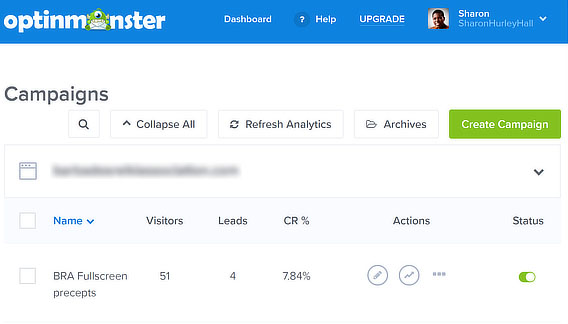
Split testing your optin campaigns is pretty easy if you’re using OptinMonster.
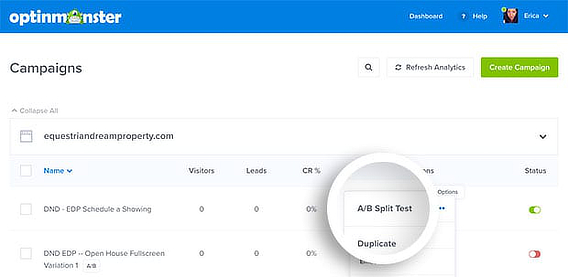
Just go to your dashboard, find the campaign you want to test and click on the three dots on the right to find the dropdown menu. Select A/B Split Test to go to the split test creation screen.
Give your split test a name that helps you to identify it, and add some notes about the test, such as details of what you plan to change. This’ll be useful later, especially if you run a lot of split tests. Click the Create Split Test button.
Then choose the element you want to modify. Remember, there will only be ONE change for each variant, otherwise you won’t know for sure what has worked.
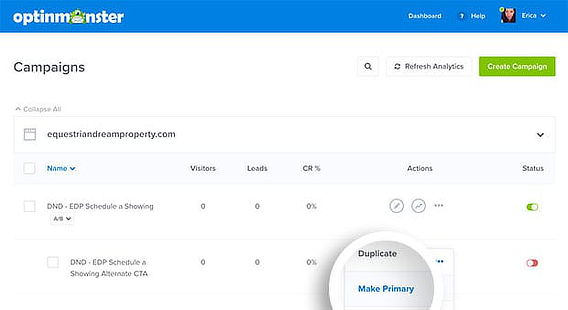
Give it some time, then check your dashboard to see what results you’re getting. When you have a clear winner (we’ll talk more about this in the section on split testing best practices), you can click the Make Primary button so all your visitors can see that version of your optin campaign.
Learn more in our tutorial on creating a split test in OptinMonster.
Of course, split testing is an ongoing process for most marketers, so you’ll likely run lots of tests till you have optimized everything you can – and then you’ll start again.
How to Run Split Tests with Google Optimize
Google has a free A/B testing tool, called Google Optimize. As with all Google products, you login with Google to set up your Google Optimize account. Then you’ll need to set up a container, which is Google-speak for a collection of configuration information for your website.
You’ll also need a Google Analytics account so you can link Optimize to your existing Analytics web properties.
Next, install the Google Optimize code on your website. Google provides twoways to do that, depending on which Google products you’re currently using. If you’re using WordPress, you can easily add Optimize to your site in just a few clicks with the MonsterInsights Google Optimize addon – no need to edit any code or hire a developer.
Now, here’s how you create a split test with Google Optimize.
Once you’re logged in, click the container name for your website, then click the Create Experiment button.
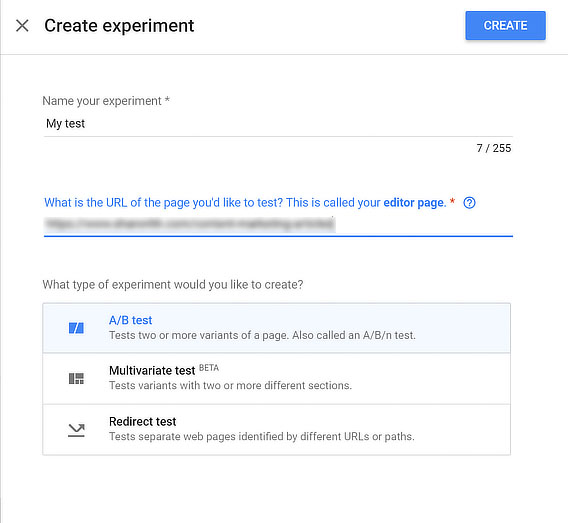
Give your experiment a name, and enter the name of the web page you want to test. Choose the type of test you want to run. As well as A/B tests, Google Optimize lets you run redirect tests and multivariate tests. Click the Createbutton.
Next, you’ll go to the test details page, where you’ll add variants, objectives and targeting.

Google will prompt you to install the Google Optimize extension for Chrome, which you’ll need for on-screen experiment editing.
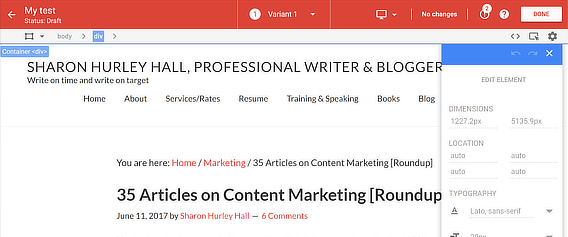
Click on the element you want to edit, and you’ll get a drop-down menu of options. In this test, we edited the headline. Here’s the original:
And here’s the variant:
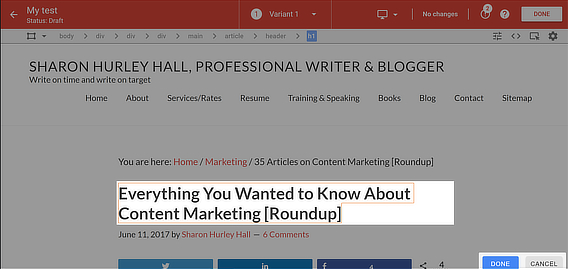
Click Done » Save » Done to save your variant and return to the Optimize dashboard. You’ll notice that Google Optimize has automatically divided your traffic in half.
Next, set an objective for the test. This is one of the goals you’ve already set in Google Analytics. Since you can only have a limited number of goals in a single Analytics view, you may need to set up additional views with their own goals in Analytics to make it easier to run multiple tests.
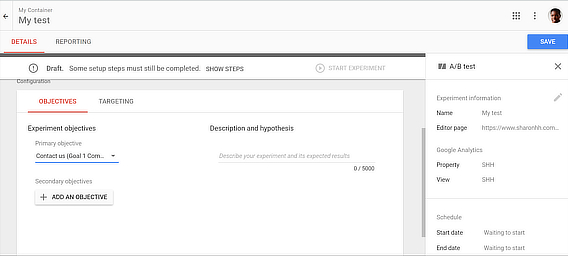
Include a description of your test and results in the space provided, then save the test. Once you are happy with what you’ve entered, click the Start Experiment button to run your split test.
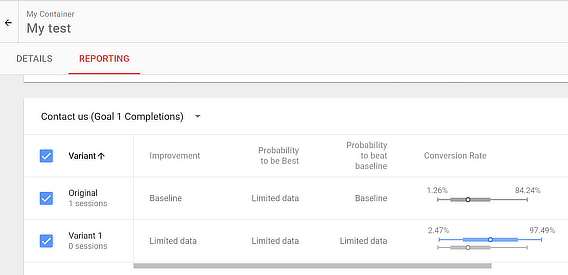
Depending on your site’s traffic, you’ll want to run your experiment for at least a couple of weeks, or until you have measurable results. As the screenshot below shows, it’s too early to measure results for this Google Optimize test. We’ll talk more about that below when we cover split testing best practices in the next section.
Split Testing Best Practices
Here are some additional tips for successful split testing.
First, make sure you’re testing the right pages and elements. That’s why it’s so important to collect data. When you have analytics data, you’ll know which pages help people take action and convert, and which don’t.
If a page has no impact on conversions, why bother testing it? On the other hand, if there’s a page that most people visit before buying, then that’s definitely worth testing and improving.
If you’re planning to test multiple pages, then prioritize the ones with the greatest potential to affect leads and sales.
You’ll also need to run your split test for long enough and have the right A/B testing sample size to get reliable results. In a nutshell, the lower your traffic, the longer you’ll need to run your split test.
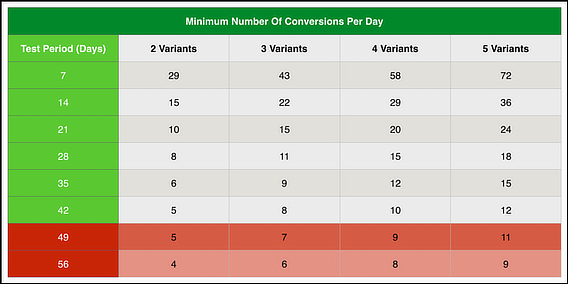
This guide from Digital Marketer can help you work out your testing schedule based on the number of conversions:
And Visual Website Optimizer has a calculator for working out the reliability of your data, based on visitor numbers and conversions:

It’s also important to measure how sure you are that making a change will bring results, called the confidence rating. This should be at least 95%. Here’s a tool from Get Data Driven to help you to assess this.
When split testing, make sure you’re comparing like with like. For example, when testing optin campaigns, there’s little point in comparing a welcome gate with an exit intent popup, because visitors see them at different times. Instead, you’d compare two versions of your welcome gate or two versions of your exit-intent popup.
Finally, the more you test, the more improvements you can make. Each successful test gives you a new baseline from which to run a new test, and you can also roll out any changes to other parts of your site.
Here’s one of our favorite split testing examples. Social Media Examiner split tested its optin forms regularly to increase its subscribers by 250,000, getting a 66% increase in daily subscriber signups. The site continued “constantly tweaking” to see what other improvements it could engineer.
10 Split Testing Tools
In addition to Google Optimize and OptinMonster’s built-in split testing tool, there are several other A/B testing tools you can use to run a split test. In most cases, the split testing software works similarly to Google Optimize, allowing you to make changes in a visual interface before running a test.
Here are a few of them:
There are also WordPress specific A/B testing software tools that let you get split testing statistics in your WordPress dashboard. These include:
- ABPress Optimizer
- Nelio
- Simple Page Tester
- Title Experiments (here’s a tutorial)
- WordPress Calls to Action
Now you know why it’s important to split test your optin campaigns and web pages and how to do it so you can improve your marketing based on data, and not guesswork. To make sure you’re on the right track, see our list or a/b testing best practices. Plus, here are some more A/B tests you can run on your popups to make them even more effective.
Remember to follow us on Twitter and Facebook for more free marketing guides.


No comments:
Post a Comment